This article will go through:
- Prerequisite
- Appointment Scheduler
- Job Scheduler
- Assigning Technician and Job Clocking direct from the Customer Order > Service Job
- Log Technician Leave Time
Prerequisite:
- The Dealership's Default Working Hours have been setup in the Account Settings > Settings & Controls - Shop Settings
- Each relevant Technicians has been setup for Payroll Clocking and Job Clocking and their default work days have been set in Account Settings > Users - Time Clocking Staff
Appointment Scheduler
- From the Blackpurl Header > click on

- Let's break the Scheduler screen down for you:
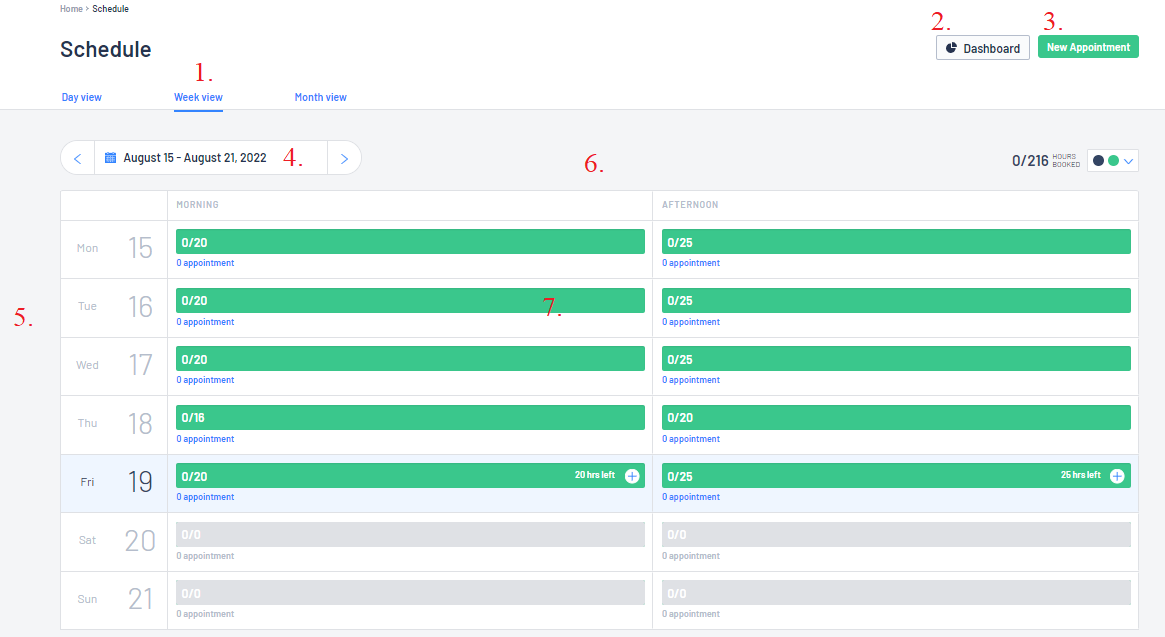
- Day View - this will allow the user to see just a single day view
- Week View - this will allow the user to see a weekly view and work out if they have overbooked etc
- Month View - the user can see at a glance what their month is like
2. Dashboard - this will allow the user to access the Workshop Dashboard
3. Appointments can be created by clicking on New Appointment
4. This is the date range - just use the toggle to scroll to the other date ranges
5. The day / date are listed on the side
6. The days are split into Morning and Afternoon appointments
7. This will indicate how many hours have already been booked and how many hours are still available
 will also allow you to create a new appointment
- In our example, we are going to book in / make an appointment for 2.5 hours to do a 10,000km service and safety check on Catherine's Harley-Davidson on the 29th August 2022
- Just click on the
 at the top of the screen.
OR
- Navigating to the date and either morning or afternoon you want and then clicking on the

If you create a new appointment this way, the date and morning/afternoon time will auto populate.
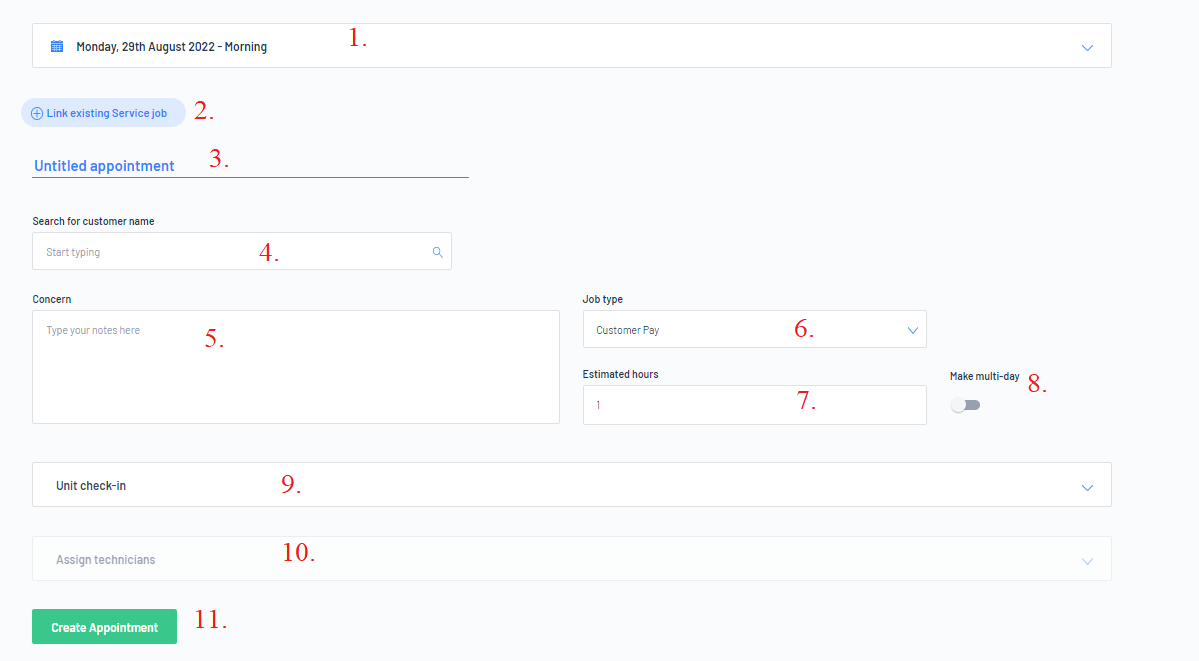
2. If there is already an existing Service Job, you can link this appointment to it by searching
3. In the Untitled appointment section - it will allow you to give the appointment a name ie 10K Service
4. You can search for the Customer Name (or create a new customer)
5. Type in the concern including any notes from the customer ie what the customer would like you to
6. Job Type - Who is paying? Customer Pay / Third Party / Internal
7. Estimate hours - how many hours you think it is going to take. This estimate hours is needed
8. If the appointment is going over multiple days, move the toggle to indicate Make multi-day
9. You can assign a Technician at this time (if required)
- Date and Time due In
- Date and Time promised
- Unit Arrive indicator


4. The Scheduler for the 29th August 2022 in the morning has now changed and our estimated time
of 2.5 hour appointment has now been taken into consideration
Job Scheduler
- When you were creating the appointments, the dealership had the option of assigning a technician
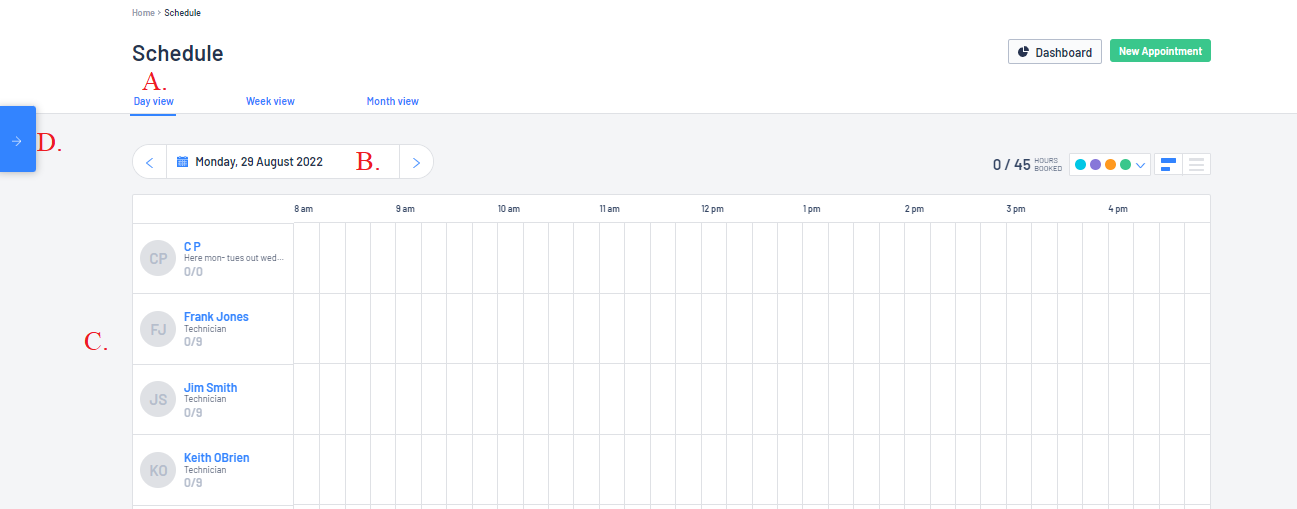
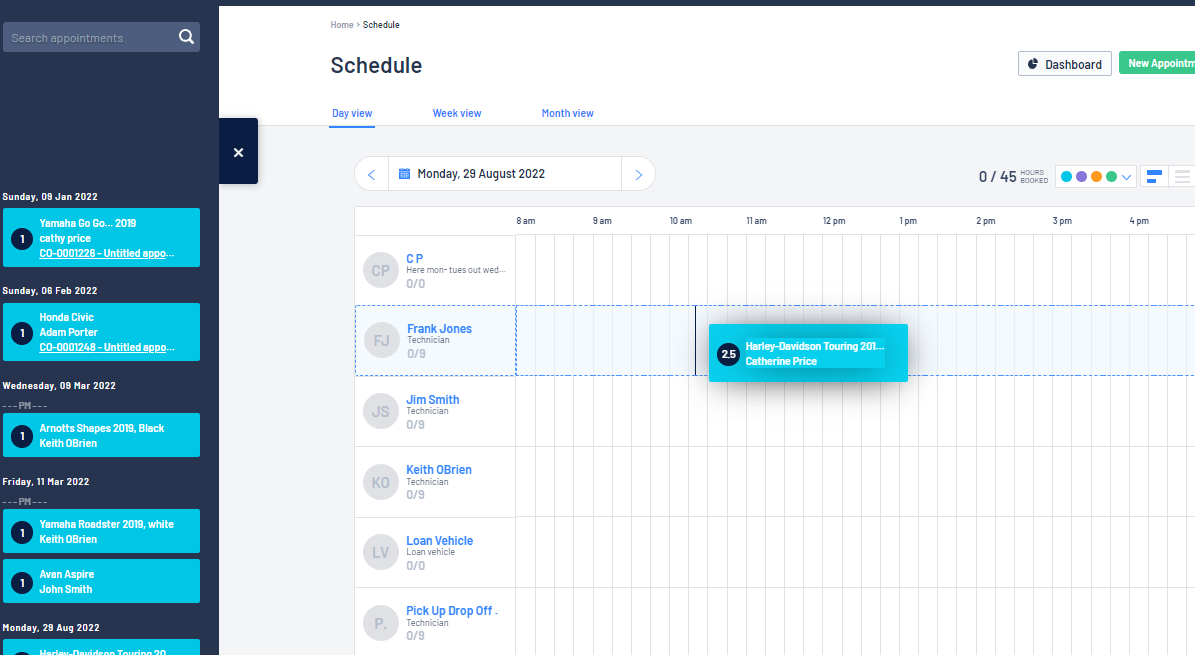
- Click on the
 to open and list all the unassigned appointments - see D. above

You can search for an appointment or just scroll to the appointment you want to assign. Then:
- Click and hold on the appointment
- Drag and drop the appointment over to the time slot you want, under the technician you want
Do this for all the unassigned appointments to organise your technician's day
- If a Customer Order > Service Job has not been linked to this appointment, once you have assigned an appointment to a time slot and technician, the system will automatically create a Customer Order > Service Job for you

Assigning Technician and Job Clocking Direct from the Customer Order > Service Job
There is also the ability to Assign Technician and for Technicians to Job Clock on / off directly from the Customer Order > Service Job > Technician Time section

Log Technician Away Time
We need the Scheduler to reflect away time so the dealership is not booking in appointments or assignment jobs to technicians when they are not even going to be there
For our example our technician Frank will be away from the 26th October to 31st October 2022 on annual leave
The best way to do this is to Log Leave time
- From the Job Scheduler tab, click on Frank's name

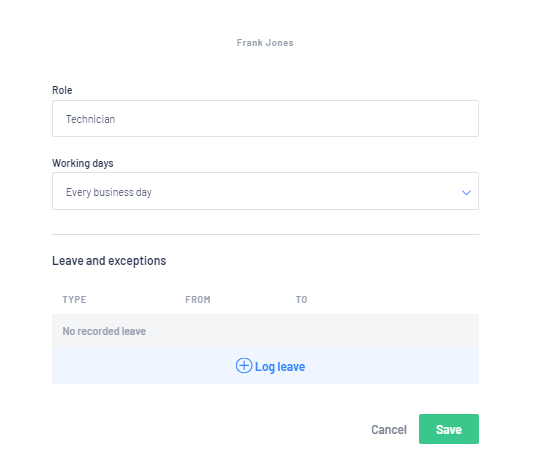
- To record his annual leave, click on
 and complete
Once you are happy with the entry, click on
 to add it to the list
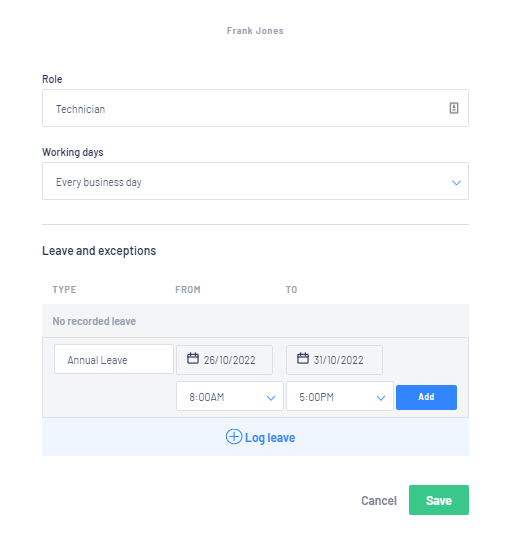

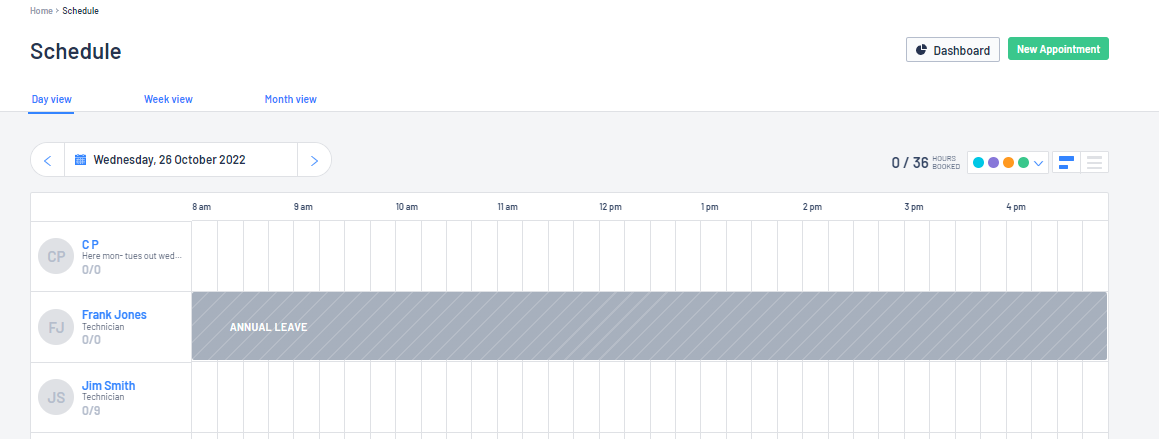
- Now if you go to that date range on the Appointment Scheduler, the available time has reduced to indicate that the dealership only have one technician available
Was this article helpful?
That’s Great!
Thank you for your feedback
Sorry! We couldn't be helpful
Thank you for your feedback
Feedback sent
We appreciate your effort and will try to fix the article