This article will cover what Branding is and how it can be setup in Blackpurl
What is Branding?
Your Dealership may have several different business entities that all use the same Blackpurl but each business entity has their own logo and contact details
Ideally when you sell or purchase items for a particular business entity within Blackpurl, you will want that relevant business entity's details to print on the documentation ie Customer's Tax Invoices / Packing Slips / Vendor Orders etc
For example:
- We have a company called - Price Dealership
- Price Dealership comprises of three business entities that all use Blackpurl but all sell or service different things - Price SHOP 1 / Price SHOP 2 / Price SHOP 3
- Each time we sell anything from Price SHOP 1, we want the documentation from Blackpurl to have the relevant Price SHOP 1 logo / contact details / disclaimers etc to print
- Each time we process a Vendor Order from Price SHOP 1, we want the Vendor Order to have the relevant Price SHOP 1 logo / contact details etc when printing or emailing
How to setup Branding
Please contact your Blackpurl Support Team and request that your Dealership wants to use the Blackpurl Branding feature as this feature needs to be enabled
Blackpurl Support will then enable the Branding feature and advise that it has been completed
The Dealership will then have access to a new System Settings > Branding Management and the Dealership will be responsible for finalizing the setup
Tip:

If you cannot see the Branding Management option in the System Settings dashboard, please check with you Manager as you may not have the correct User Permission.  This article may assist - User Permissions - Account Administration section

- Click on
 then click on
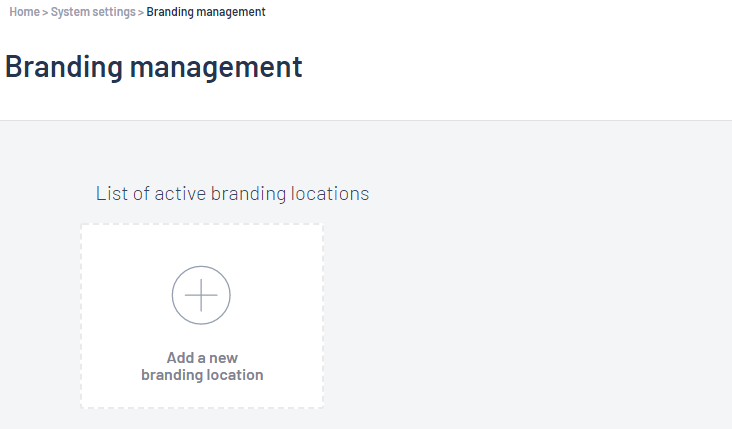
- The first section will allow you to complete the details of your new location and also upload the relevant logo for that site etc
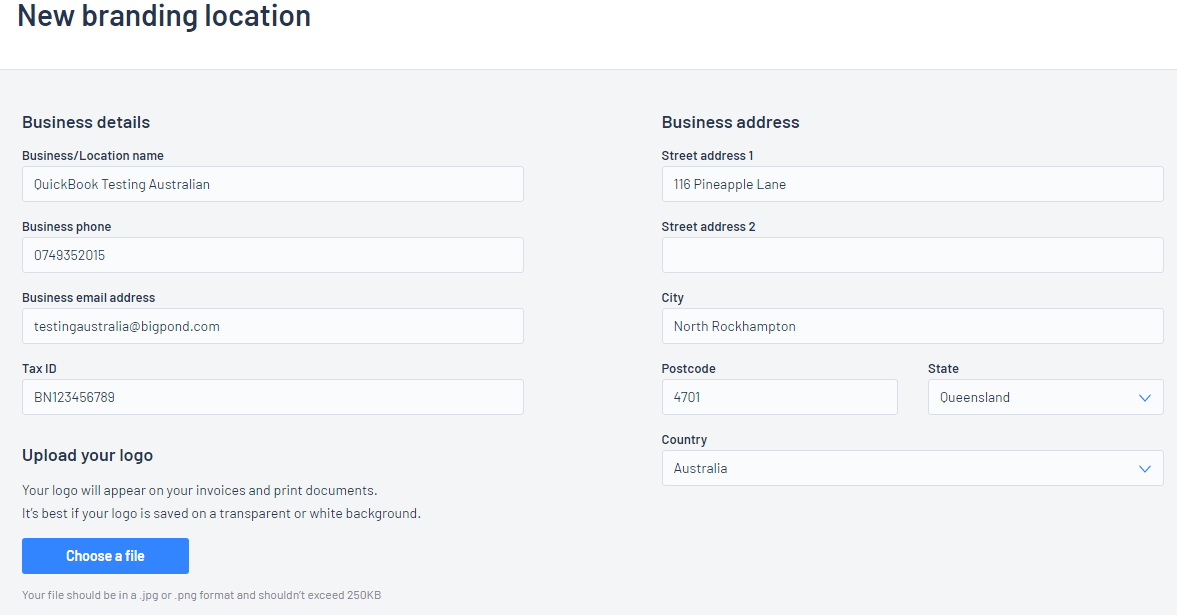
Tip:

The business details will automatically default to your current business profile details

If you want specific information ie address etc, please replace these details with your new location etc
- The second section will allow you to set up how you want the Customer Invoices / Service Jobs / Disclaimers etc for this Branding location
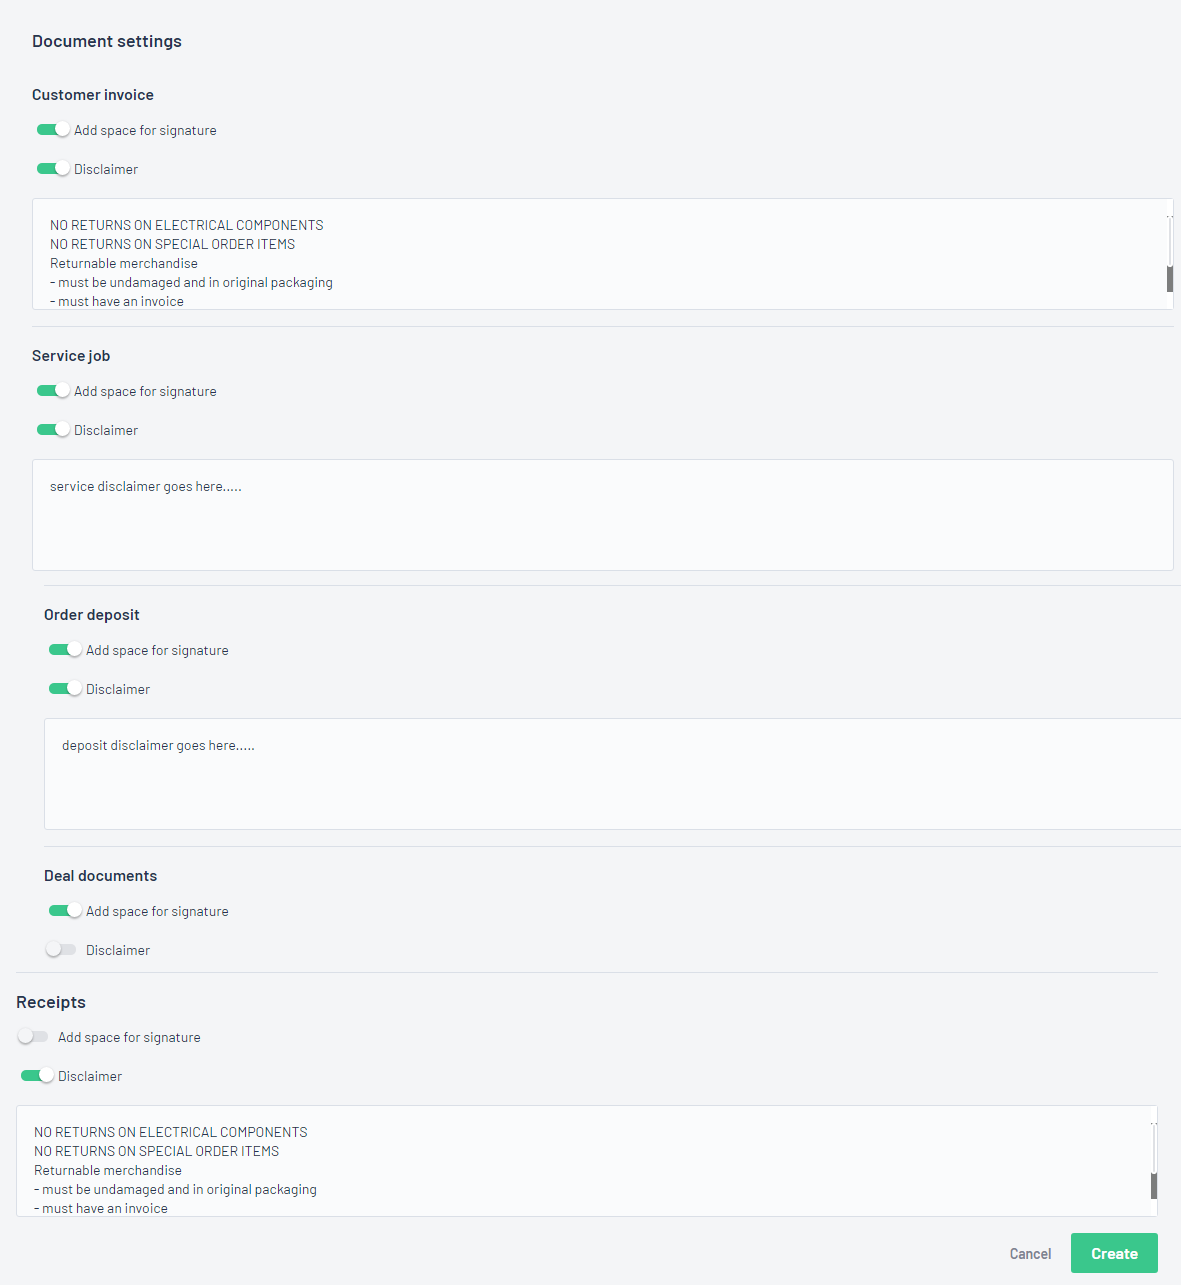
- Once you have finished click on

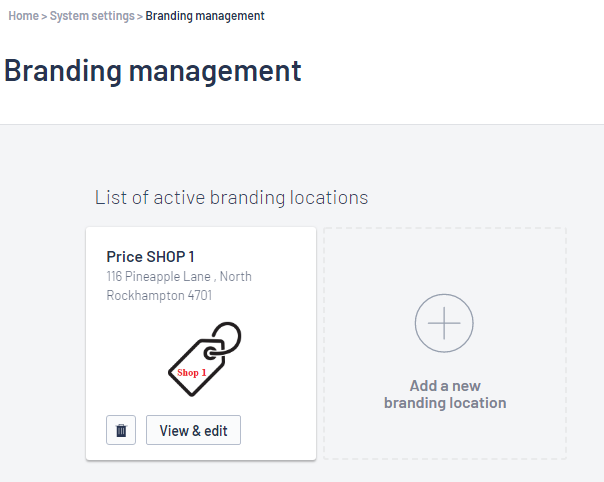
- The new Branding Location will now list:
- For each additional Branding Locations > repeat steps 1 through 4 for each new location
Setup Complete - How to tell Blackpurl which Branding you want to use
- Once the Branding has been setup, the first time a user processes a Customer Order, Blackpurl will require the user to indicate which Branding they are wanting to use
 as they were requiring to print an Invoice preview:
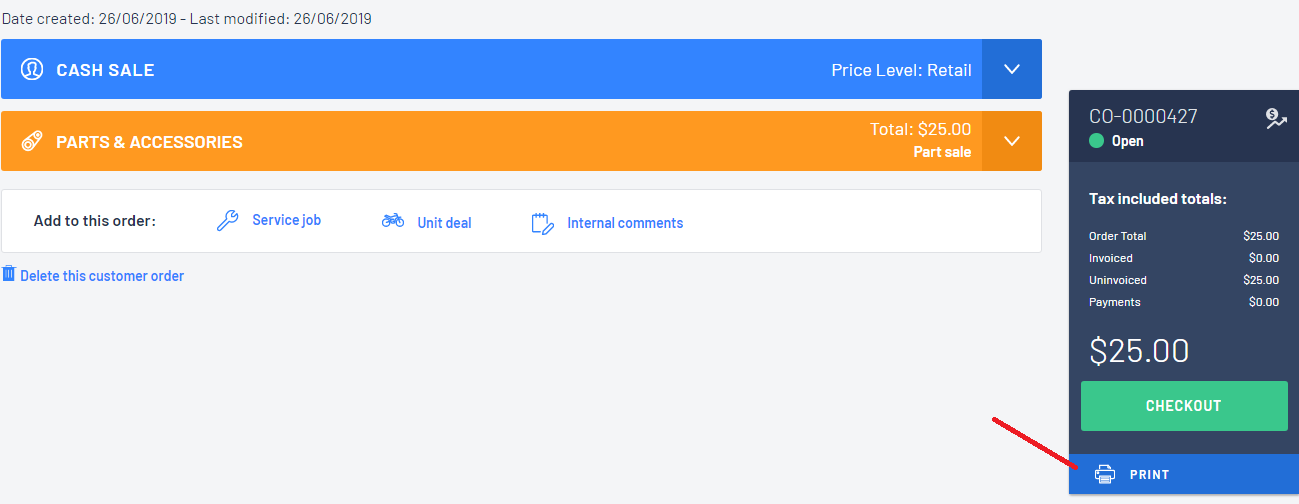
- As this the first time the user will be using Branding, the user will need to select which Branding Location they want to use and then

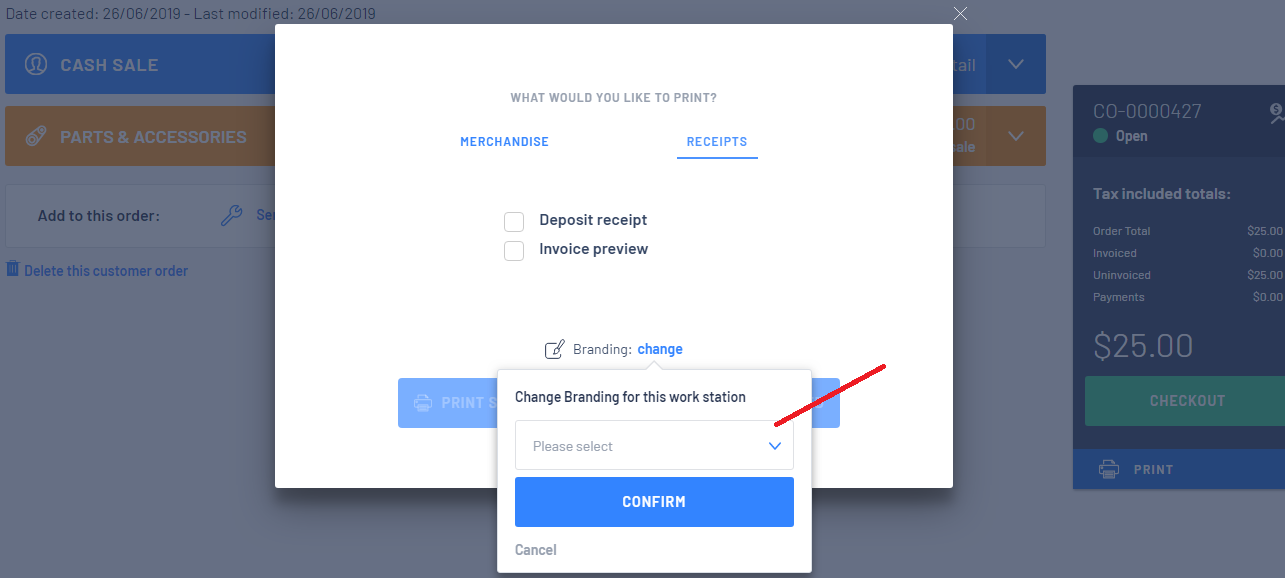
- The user has selected that they want the Branding for Price SHOP 2
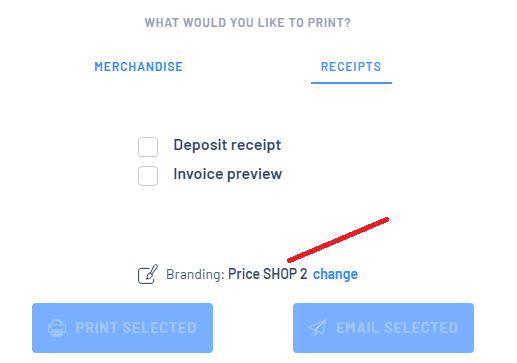
 and making a new selection
- The Branding Location is now set so going forward all documentation from Blackpurl will now be branded as Price SHOP 2
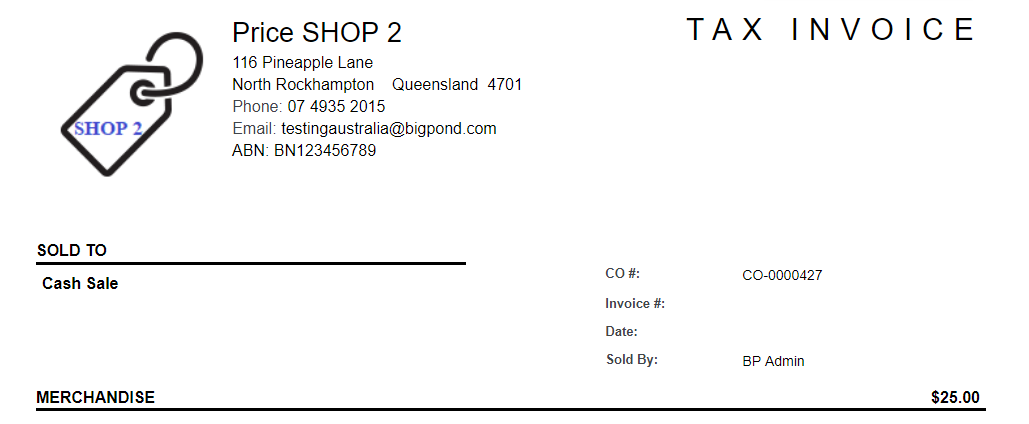
This will also include Vendor Orders - whichever Branding Location has been selected for this user, will be the Branding used when Printing or Emailing Vendor Orders