This article and video will show you how to create / add a new Vendor to your Blackpurl
The article will also go through how to edit the Vendor Record if necessary (change Address etc)
Video - How to Create / Add a New Vendor
Article - How to Create / Add a New Vendor
- From the Blackpurl Header > Click on
 >
> 
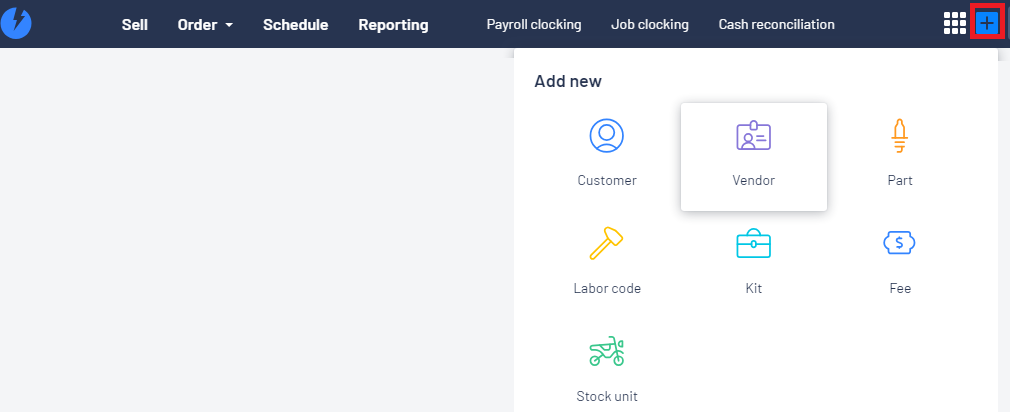
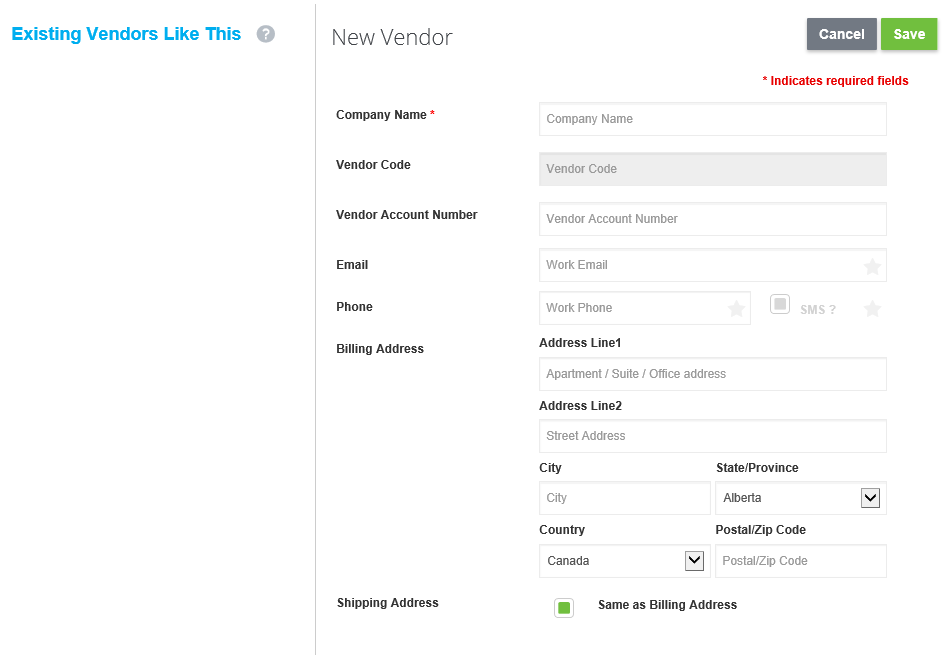
- Complete the relevant details on the New Vendor window and then click on

Notes:
- If the information you are entering matches an existing Vendor, that existing vendor will list in the area under
 for you to review
 - If the Vendor has given you the additional information that you want to record, click
 to show and add more options ie Facebook / Fax / LinkedIn / Other Email / Other Phone / Part Category / Products & Services**/ Sales Price Level / Twitter / Website / Vendor Tax Id (This would be where our Australian dealers would type in the Vendor's ABN)
**Products & Services include Part Purchases / Merchandise Purchases / Unit Purchases / Sublet Purchases / Claims for Service Work / Deal Products / Flooring Company / Finance Company / Financing Products
For further information on Products & Services, please review our article - How to Setup Vendor Products and Services
How to Edit a Vendor Record
The Vendor may have changed some of their details ie telephone number or address so your Vendor Record in Blackpurl will need to be updated as well
- Navigate to the relevant Vendor Record
- Click on


- On the Edit Vendor screen - simply find the field that you want to change and update the details and then

