This article will explain that the User will have the ability of completing a Vendor Receiving and a Vendor Invoice together
Prerequisite
For users to have this functionality of doing both the Vendor Receiving and Vendor Invoicing together, the user will need to have enabled the User Permissions - Vendor invoicing view and create/modify

Once you have received the items from the Vendor, a Part Receiving will need to be processed first:
1. From the Blackpurl Header - Click  >
> 
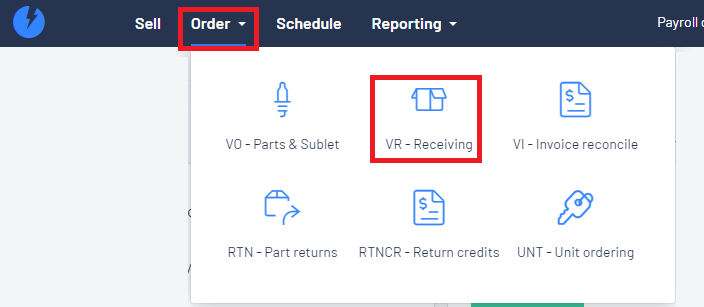
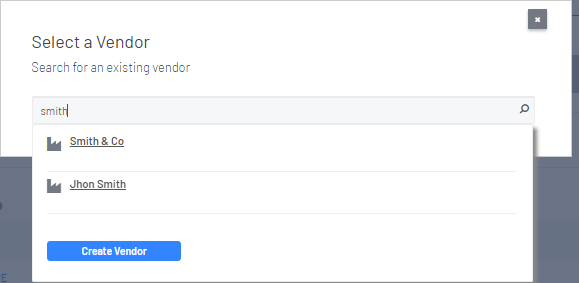
2. The Select a Vendor window, will allow you to search for your Vendor
- indicate if there are any IN PROGRESS Vendor Receivings for the same Vendor and the user can select to
 one of these VR or the user can choose
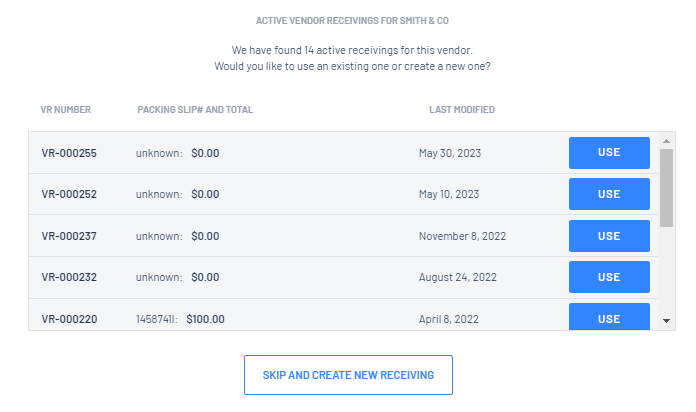
- If there are no IN PROGRESS Vendor Receivings for this Vendor, Blackpurl will automatically open a Vendor Receiving screen with the relevant Vendor's information
Then Blackpurl will
- open a Vendor Receiving (VR) window
- add the Vendor details
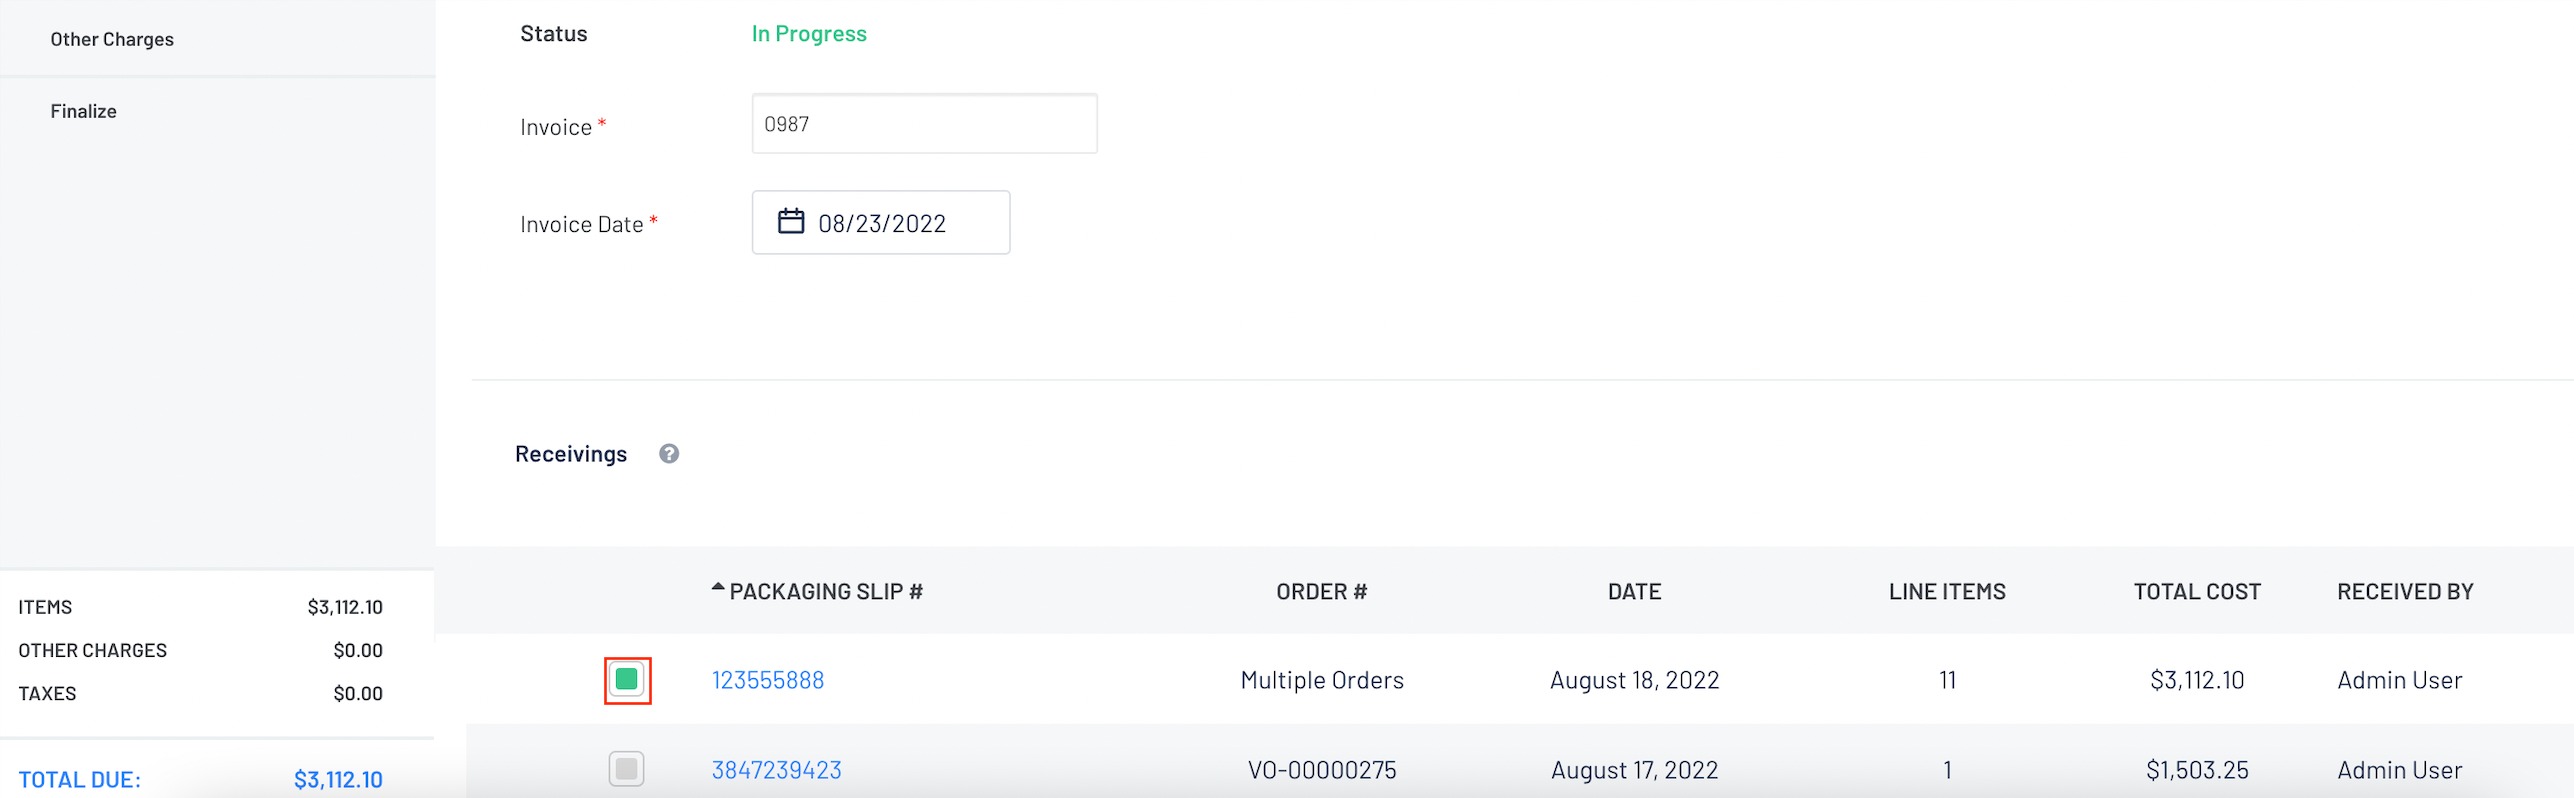
If the user wishes to process the Vendor Receiving / Vendor Invoice at the same time and have the correct User Permission, they will need to enable the toggle - Receiving from an Invoice

Once the toggle is enabled, the User will be asked to enter in a Vendor Invoice number (instead of a Packing Slip number)

- it will also list any Vendor Orders that have not been fully satisfied and by default it will not have any Vendor Orders selected
But if you wish to change this and have your Blackpurl to have the system auto-select ALL Vendor Orders, there is a System Setting that will allow this control. Please review our article - System Settings > Settings and Controls
You can either use the search function to select specific Vendor Orders or just check the relevant checkbox against the Vendor Orders you are going to receive against

4. For each line item you are receipting, check the relevant checkbox > then click on 
*** If the list is very long, use the Find a Part search feature

- change the quantity received (if it differs from the amount you actually ordered)
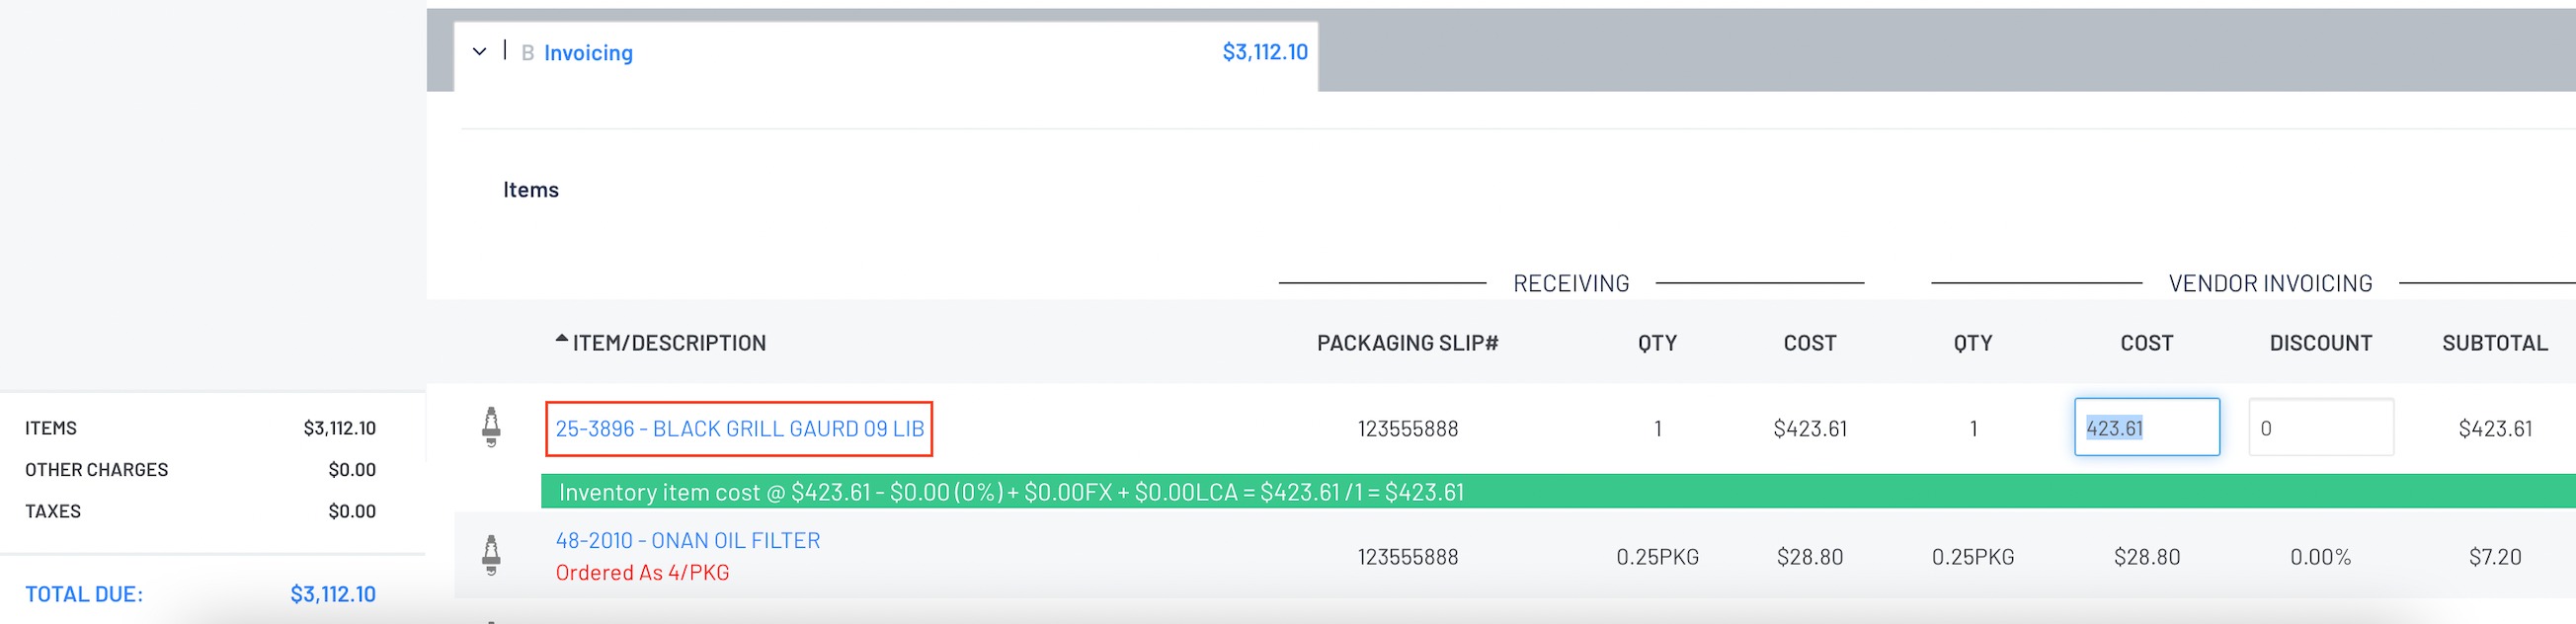
- modify the cost - remember you are doing the Vendor Receiving and Vendor Invoicing together so you can change the cost (if required) in the Vendor Receiving or Vendor Invoice stage
- add in any discount - remember you are doing the Vendor Receiving and Vendor Invoicing together so you can change the discount (if required) in the Vendor Receiving or Vendor Invoice stage

You may get a Cost variance warning notification as below and this document will explain what this is all about - Part Cost Control Feature

If you do not get a Cost variance warning notification, just continue with the Vendor Receiving
The user will also get the option of changing the Sales Price / Retail / MSRP / Locations from the Vendor Receiving screen
Click into the relevant part line item and then 

This will open up the Update Part window to make your changes - don't forget to click on 

5. To finalize the Receiving > Click on 

Before finalizing you may want to review the total section on the Vendor Receiving as it may be a guide to work out if you have missed something out of the Vendor Receiving

6. Once you have clicked on  Blackpurl will automatically generate a Vendor Invoice

7. It will list any unmatched packing slips - select the packing slip that you are matching this Vendor Invoice
to by checking the relevant checkbox
8. Once a packing slip is selected, all items on that packing slip will list in Invoicing section
This is now the time when any variances are corrected / add in any discounts etc
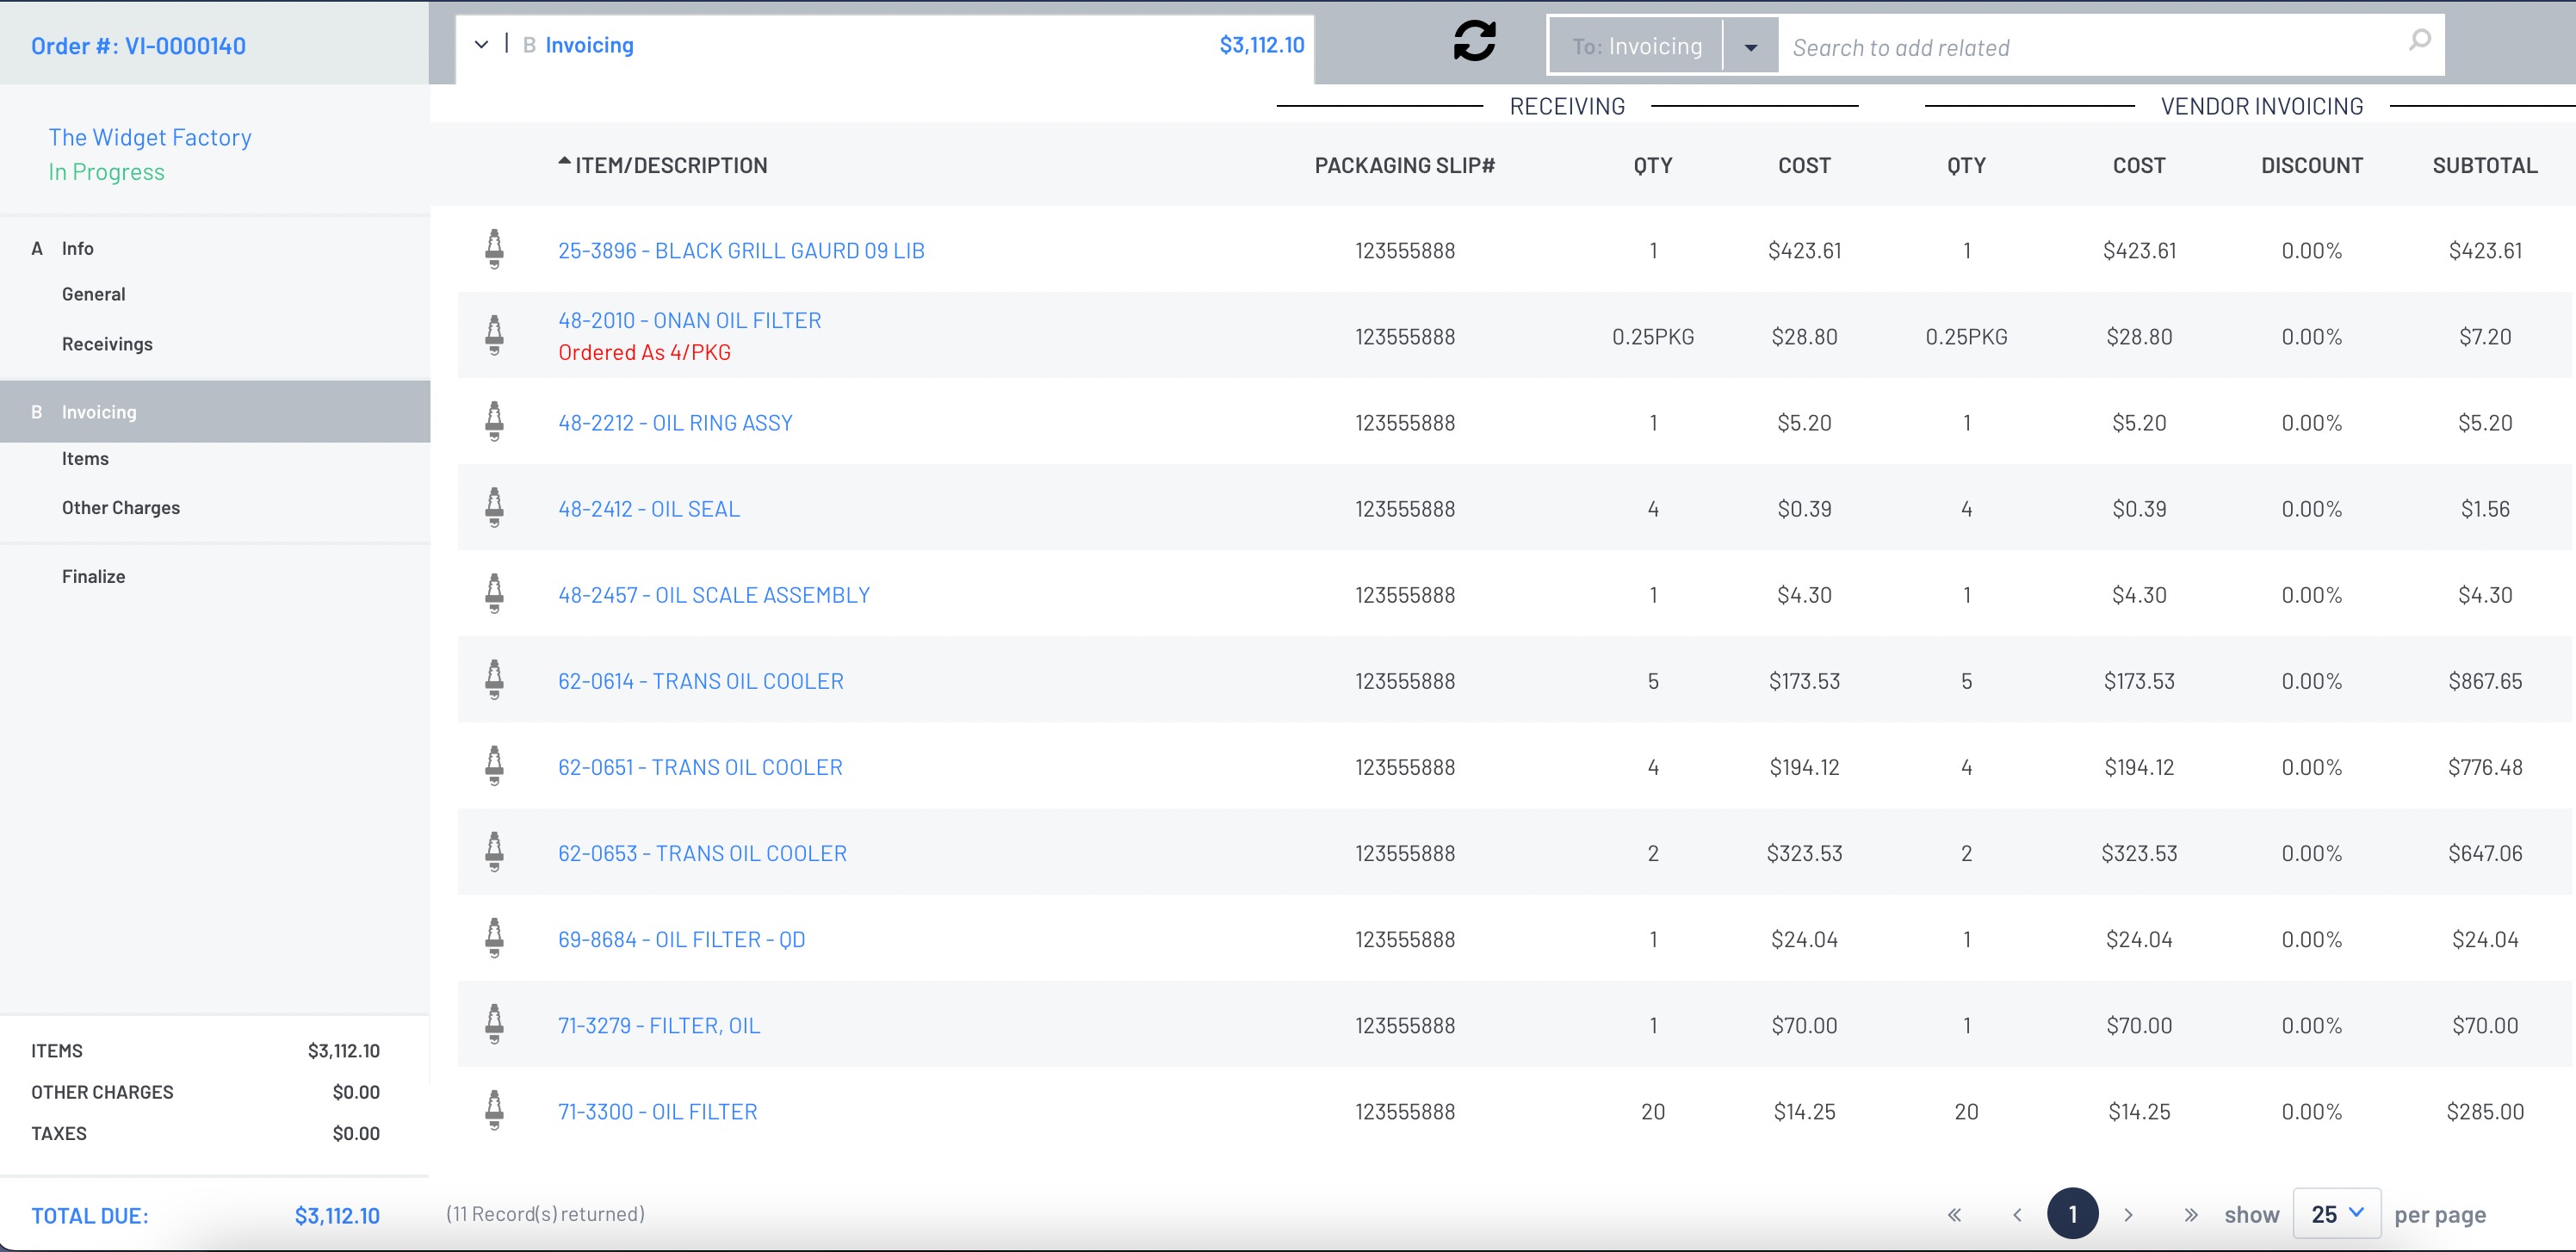
Please remember - the amount of the Blackpurl Vendor Invoice must equal the amount of the hard copy of the Vendor Invoice that you are processing so check your totals before you finalize the invoice

The fee will need to be already created and available to use in your Blackpurl
Once the fee is available in Blackpurl, to add it to the Vendor Invoice, scroll to the
 section and click on
- This will take you to the Search to add section for you to search for and select the relevant fee
- Once the user has added the relevant fee to the Other Charges section, the user will need to change the information and Cost to suit
- Blackpurl does give the user the ability to do both a positive and negative amount
The option - Include other charges as part of the inventory costs? - can be enabled at this time
For further information, please review our article - Landed Cost Adjustment (LCA)