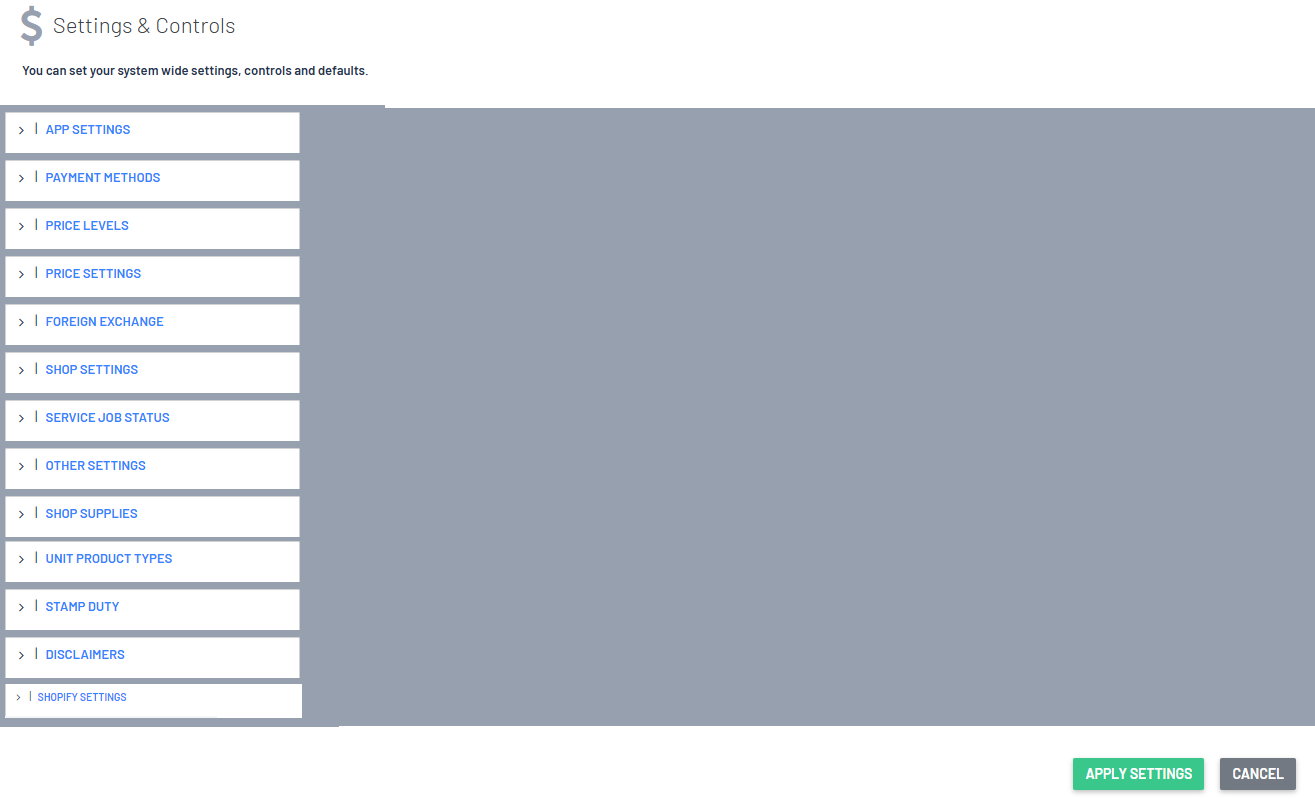
This article will go through an overview of System Settings > Settings & Controls section of Blackpurl with links to the relevant articles on the Settings & Control that you need further information on
If you do not have access to System Settings > Settings & Controls, you may not have the required User Permission and we would recommend that you discuss your permissions with your Manager
Some of these Settings & Controls may also not be on your list in your Blackpurl ie Shopify Settings will only show up, if your Dealership has Shopify / Blackpurl integration / Stamp Duty is for our Australian Dealerships only etc
System Settings > Settings & Controls
From the Blackpurl Header, click on  then select System Settings

From the System Setting dashboard, select 

When you access Settings & Controls all sections will be minimized - click on the relevant section to open up the options

App Settings
This section is populated with your information at the time of activation but feel free to update it yourself (if and when you require) - just be aware that there maybe ramifications if you change something that you shouldn't have
- Region
The region is the country that you live in - Australia / New Zealand / Canada / United States of America
- State or Province
What state or province your Dealership is located at?
- Dealer number (for use on Unit Deal Forms)
Do you have a dealer number that you need to use or print on Unit Deal forms?
- Timezone
What timezone is your Dealership in?

Payment Methods
This is a list of the Payment Methods available in your Blackpurl and these are standard across all Dealerships

The active Payment Methods will then be available for section in the Deposit and Checkout sections on Customer Orders
This article will provide further information on Payment Methods - Selecting Payment Methods
If you have Accounting Integration, please also review this article - Undeposited Funds General Ledger - Blackpurl and Accounting Package (Xero and QuickBooks)
Price Levels
This will list the Price Levels currently setup in your Blackpurl

We do provide the Dealership with a small list of Price Levels when your Blackpurl is first created in activations but the Dealership can amend as required
Please understand the ramification of changing these fields / making them inactive etc before you make the changes and if in doubt, please reach out to Blackpurl Support and let them know what you are wanting to do for their advice
Price Settings

What is the default price level you want to use for Customers?
This means that each time you create a new Customer, the new Customer will start with the default price level
Round cash payments to the nearest X cent
This section indicate your rounding cent. The options are 1c / 5c / 10c
Stamp Duty rate
What is the stamp duty rate in your location? (only if applicable)
What is your default price level for Internal Service Jobs
Default environmental fee
Do you have a default environment fee? If so, indicate it here
Foreign Exchange
Please read this article before you enable Foreign Exchange - Foreign Exchange
This is for our Dealerships that are purchasing parts and/or units in foreign currencies
It will mean that the Dealership will process parts and unit Vendor Invoices using the foreign currency attached to the relevant Vendor
If you have Accounting Integration - the Vendor Invoice will then integrate to your accounting package in the foreign currency
However, all inventory values in both Blackpurl and your accounting package will automatically convert to your local currency
Please note that the Dealership must first have multi-currencies / foreign currency turned on and added to your accounting package

Shop Settings

| 1. | Restrict Use of Charge on Account by Customer If your Dealership wants to restrict the use of Charge on Account and select which Customers have the option of the Payment Method of Charge on Account, you will need to enable this setting
Invoices that have been closed as Payment Method: Charge on Account - Receiving Payment of Account in Blackpurl (Accounting Integration) |
| 2. | Deal finance commissions are included in finance company payments If this toggle is enabled, it will include commissions in finance company payments
|
| 3. | Allow quick fulfilling of deal unit options If this is enabled, then it will allow the dealership the option of quick fulfilling of deal unit options For further information, please review our article - Customer Order > Unit Deal - Quick Fulfil Deal Unit Options |
4. | Auto-select orders in Part Receiving If this toggle is enabled, it will auto-select the VO in the Part Receiving screen |
| 5. | Always obey publish in feeds If this toggle is enabled, it will mean that if the Publish in Feeds is enabled on a Unit Record or Part Record, then it must be included in all FTP feeds |
| 6. | Record Tracking Numbers If this toggle is enabled, it will allow the option of a Tracking number in a Customer Order > Checkout |
7. | Enforce Payroll PIN If this setting is enabled, then staff using the payroll clocking will need a PIN For further information, please review our article - Time Clocking Staff Restrictions (Payroll Clocking and Job Clocking) |
| 8. | Enforce Technician PIN If this setting is enabled, then staff using the job clocking will need a PIN For further information, please review our article - Time Clocking Staff Restrictions (Payroll Clocking and Job Clocking) |
| 9. | TBD as invoice # on previews If this setting is enabled, when printing out Invoice Preview documentation from the Customer Order, it will indicate that Invoice# is TBD If this setting is disabled, when printing out Invoice Preview documentation from the Customer Order, it will indicate that the Invoice# is the CO number |
| 10. | Hide part numbers on documents This gives you the option of not printing part numbers on Customer Orders, etc. Some Dealerships do not want the customer to know the part numbers - especially if you are just providing them a quotation |
11. | Hide kit details on documents When enabled it will allow the dealership to list the kits on customer facing documents, just as a description line with total For further information, please review our article - How to Create / Add a New Kit and How to Hide Kit line items on Customer facing documents |
| 12. | Include MSRP and Discount on part line items If you want the MSRP & Discount to show on part line items on Customer Orders |
| 13. | Include zero priced deal options on documents If you want to include zero priced deal options on the Customer documentation on a Unit Deal, enable this option |
| 14. | Acceptable part cost variance The dealership can set a Part Cost Variance % that once breached will provide a warning notification This article will provide further context - Part Cost Control Feature |
15. | Include prices on part labels If this toggle is enabled, it will print the prices on the part barcode labels |
16. | Hide hours/rates on service documents This gives you the option of not printing the hours/rates on Service documentation. Some Dealership do not want their Customer to know the hourly rate etc |
| 17. | Allow customer service job without unit This will allow the dealership the option of allowing a Service Job to be processed without selecting a Customer Owned Unit. It will instead have the option of a Service job without a unit  |
18. | To finalize a job the status must be Ready to invoice Is Ready to invoice status required to finalize a service job? |
19. | Technician hours method on jobs Select what method is - Hours only or Time-In / Time-out |
20. | Allow pause of job clocking If you want to give technicians the ability to pause their job clocking on a job then this toggle must be enabled |
| 21. | Default Technician costing rate |
| 22. | Default odometer type What is your default odometer type for your Dealership - km/hrs/ml |
| 23. | Use QR codes instead of Barcodes on Service Document If the Dealership wants to use QB codes then this toggle must be enabled |
| 24. | Default workshop hours Add in what days the Dealership is open and for what hours |
Service Job Status
The Dealership can select which job statuses to use and also have the ability to edit the naming / labelling of the statuses and also what default status they want to use when a Technician job clocks onto a job

This article will explain in more detail - Service Job Statuses - Selecting / Editing / Enabling which Service Job Statuses to use in your Blackpurl
Other Settings

A. This is the system setting for when you want to automatically archive quotes and then automatically
delete quotes from your Blackpurl
For further information, please review this article - Archiving / Deleting Customer Order Quotes
B. The Dealership can set up your Part Aging Periods for use in the Part Inventory Aging Report
For further information, please review this article - Reporting - Part Inventory Aging
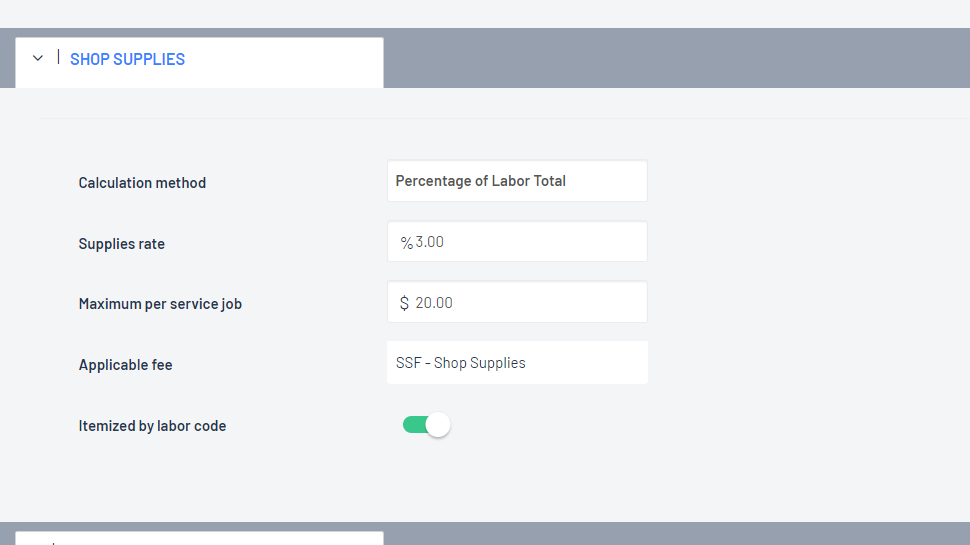
Shop Supplies
This section will cover the automatic charging on Customer Orders for Shop Supplies

This article will go through the options available to the Dealerships with regards to which technician hours method on jobs they want to use - Recording Technician Hours onto a Customer Order - Hours only or Job Clocking on/off
Unit Product Types / Unit Data Fields
This is where the Dealership can setup Unit Product Types and what Unit Data Fields can be allocated to show up on any Unit Record that has that specific Unit Product Type

What is a Unit Product Type?
It would be what type of Unit Product does your Dealership sell ie Trailers / Golf Carts / Motorcycles / Powersports etc
Then attached to that specific Unit Product Type on Unit Records, you can have Unit Data Fields that will show up on the relevant Unit Records and also it you need them to show up on specific documentation
As you can see above, each Dealership is setup with a Generic Product Type
Your Dealership can just modify this Unit Product Type and use it for all your Units - to modify, simply click on  and then just go through the Unit Product Type& Data Fields pop up
Or alternatively if you want to create a new Unit Product Type by clicking on  and go through the Unit Product Type & Data Fields pop up and make your selections

| A. | This will list the Product Type Name |
| B. | Is this Product Type active in your Blackpurl Move the toggle accordingly |
| C. | Will this Product Type will be the default in your Blackpurl? Move the toggle accordingly For example - each time you receive a new unit into stock, this will be the Product Type default that will be added to the Unit Record |
| D. | Unit Details tabs Each one of these tabs have specific Unit Data Fields available for selection You can click on the relevant tabs to see what is available and make your selection |
| E. | These are the Unit Data Field under that tab and you get to select: - Field Name - what is the name of the Unit Data Field - Field Type - is it a text field / long text field / number / date etc - Active - is that particular Data Field to be active. Check or uncheck the checkbox as the case may be - Expose on - Service documents / Deal documents / Order documents If you want the Unit Data Fields to show up on the Service documents / Deal documents / Order documents etc, then check or uncheck the checkbox accordingly |
| F. | Once you have finished - make sure you click  |
Where to see these Product Types / Unit Data Fields in Blackpurl
There are several places where these Product Types and Unit Data Fields will show up in Blackpurl
Unit Records
Simply click on  on any Unit Record to fill in any of these Unit Data Fields

Customer Owned Unit Records
Simply click on  on any Customer Owned Unit Record to fill in any of these Unit Data Fields

Unit Ordering
When creating a new Order Unit

Stamp Duty
This Settings and Controls are for our Australian Dealerships only for the charging of Stamp Duty as part of their Customer Order > Unit Deals
For further information on this setting, please review this article - System Settings > Settings and Control - Stamp Duty (Australia only)
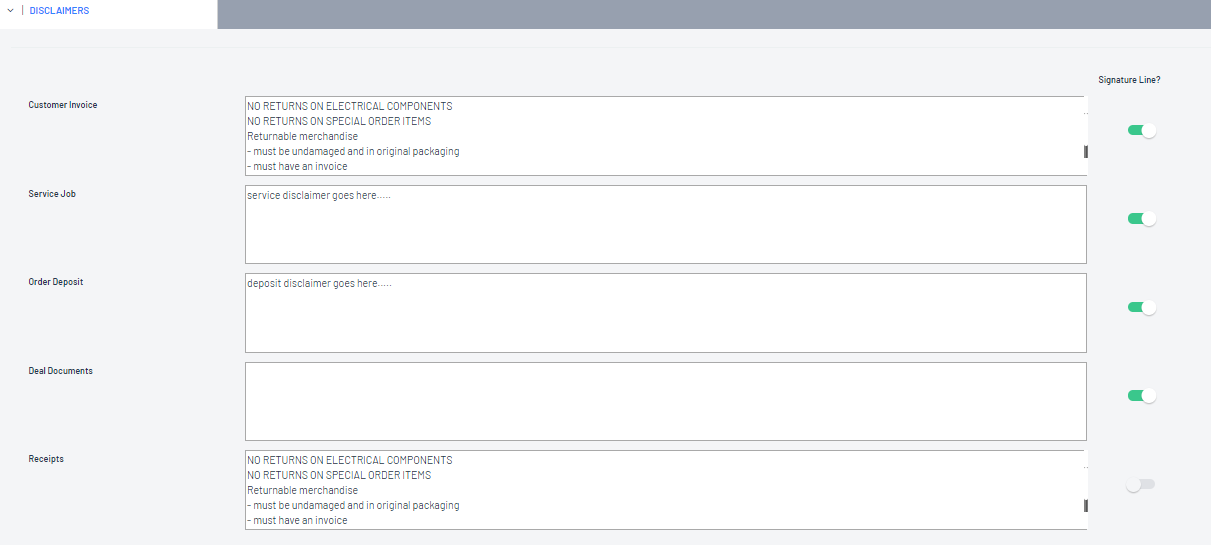
Disclaimers
This is where the Dealership can setup Disclaimers so that certain information and/or statements can print / appear on certain documents such as the Dealership's warranty policy etc

Please note that if you have Branding Management, then you would update the Disclaimer per Branding location as per this article - What is Branding / How to Setup Branding in Blackpurl (Branding Management)
Shopify Settings
If your Blackpurl has Shopify / Website Product Management active, then you will have an additional Settings and Control section - Shopify Settings
For further information, please refer to our article - Setup Configuration - Blackpurl / Ecommerce Store

