This article will take you through the process of finalise the Parts Invoice / Vendor Invoice
This step is part of the VO / VR / VI process as per this document - Understanding the Vendor Ordering / Vendor Receiving / Vendor Invoices process (VO / VR / VI) / What can go wrong
Did you know you can actually do the Vendor Receiving and Vendor Invoice together? Review this article for more information - Completing the Vendor Receiving and Vendor Invoicing together
How to Create a Vendor Invoice
- From the Blackpurl Header > Click
 >
> 

- The Select a Vendor window will allow you to search for the relevant Vendor:
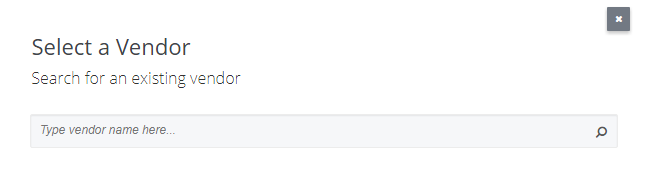
As you type your search keyword, the system will start listing the search results that match
In our example we are looking for the Vendor The Widget Factory, we type in Widget as the keyword > click on your Vendor name to select
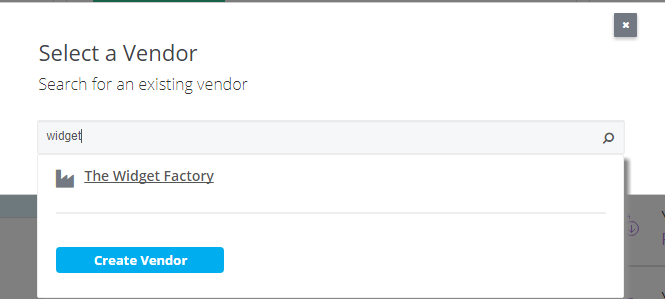
 > follow the prompts to setup your new Vendor
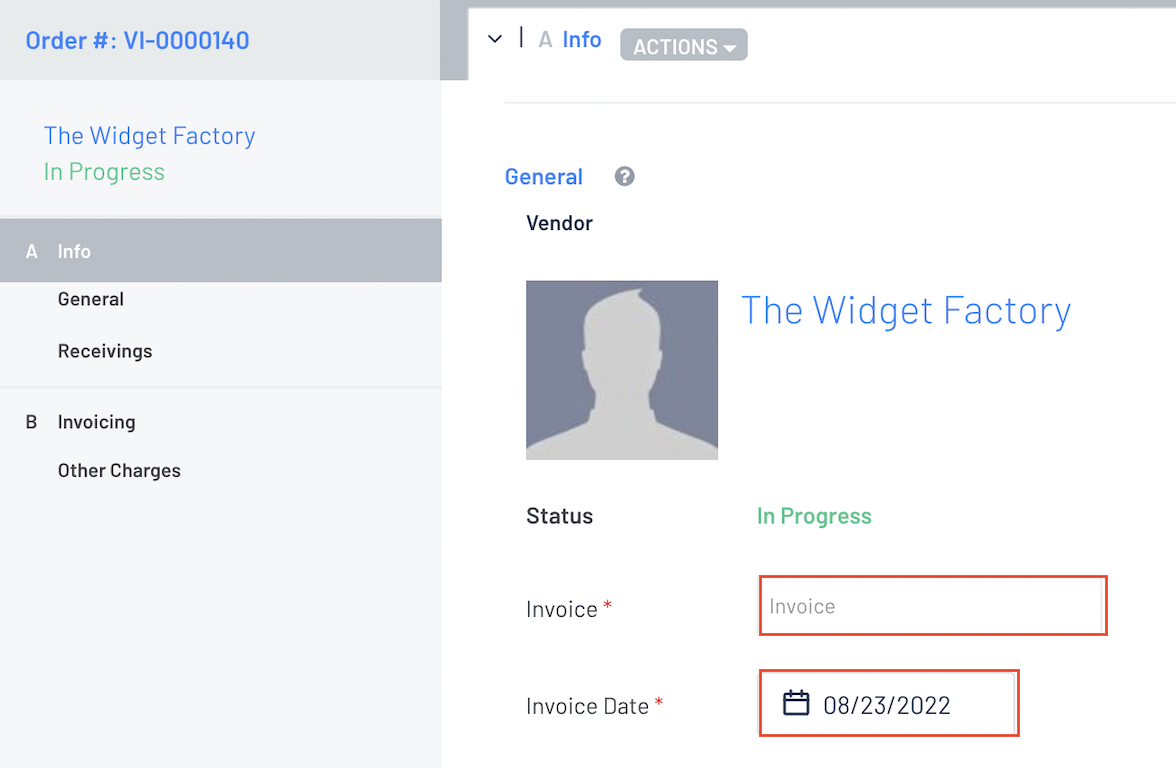
- Type in the relevant Invoice and the Invoice Date (these are required fields)
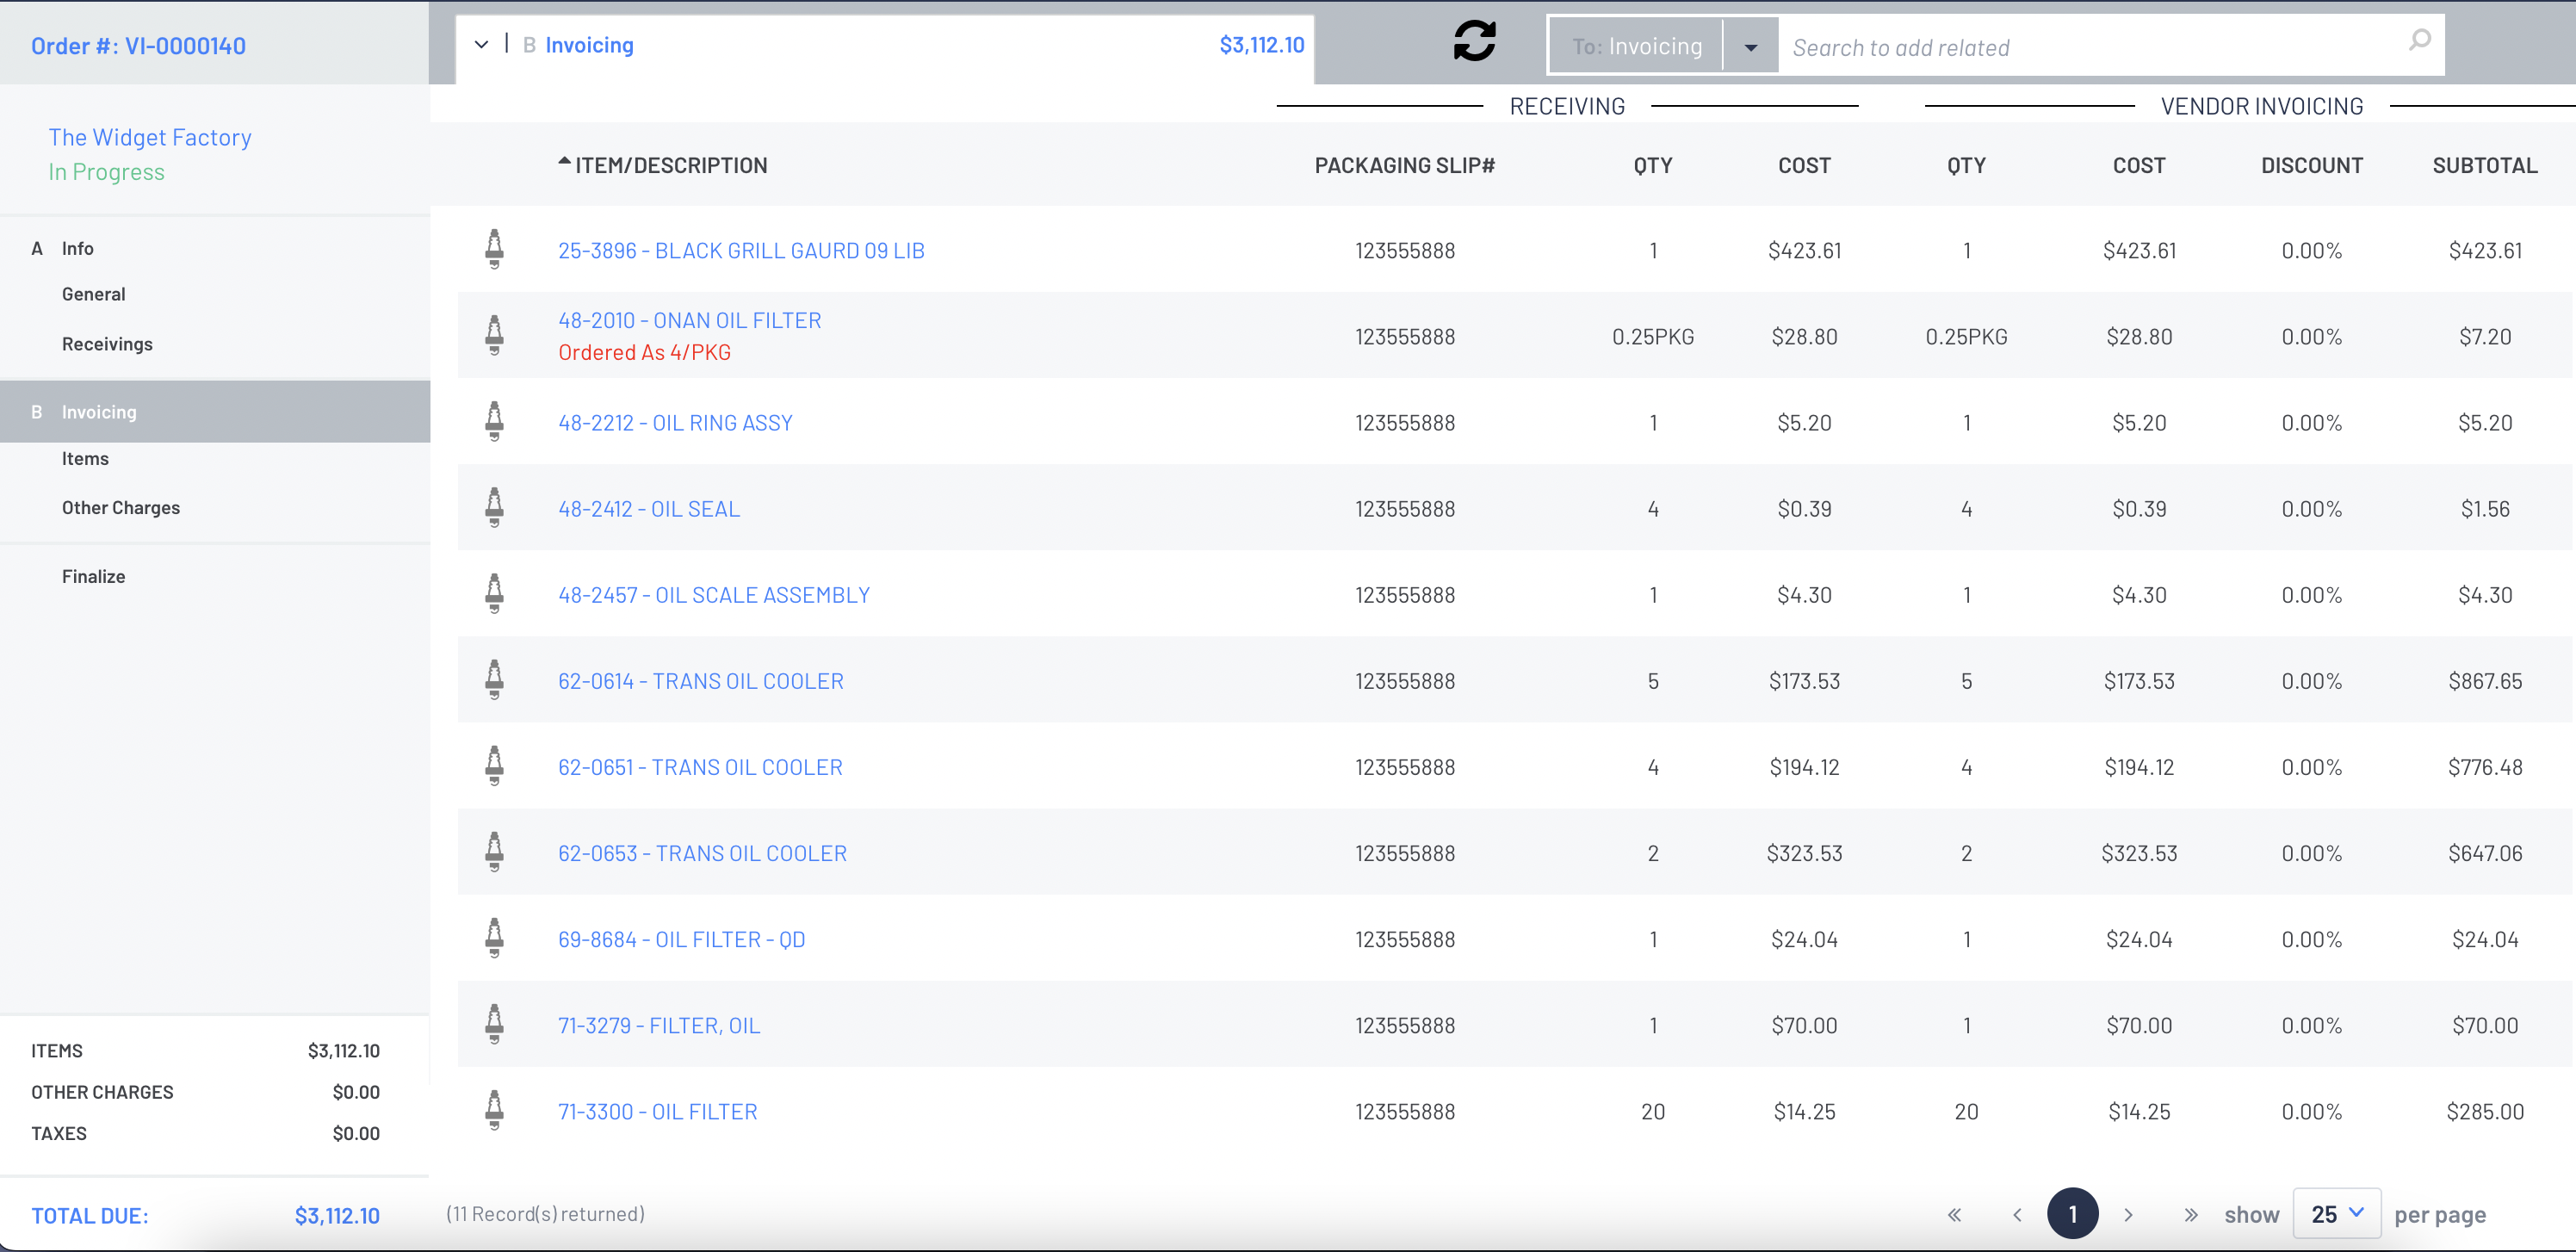
- It will list any unmatched packing slips - select the packing slip that you are matching this Vendor Invoice to by checking the relevant checkbox
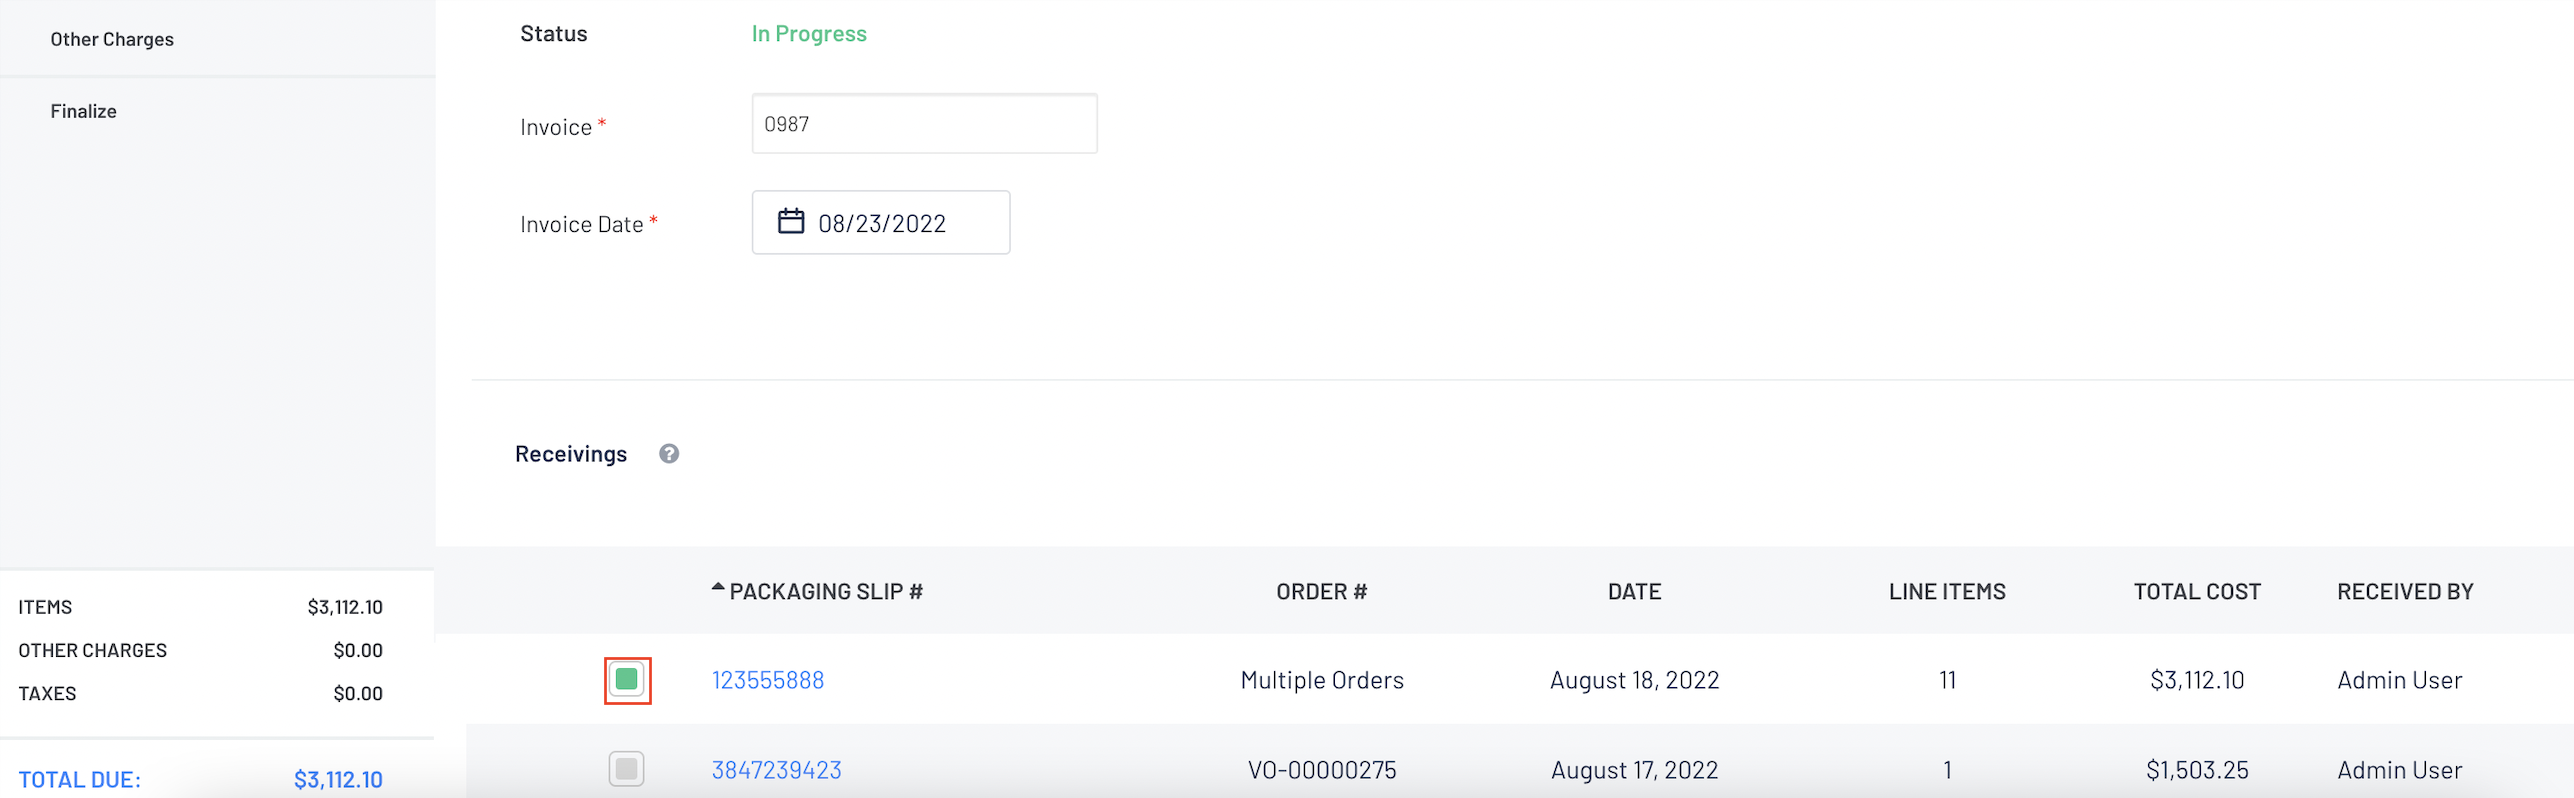
- Once a packing slip is selected, all items on that packing slip will list in Invoicing section
This is now the time when any variances are corrected.

Remember that - the amount of the Blackpurl Vendor Invoice must equal the amount of the hard copy of the Vendor Invoice that you are processing.
In this regard, the user may need to add a freight FEE or a rounding FEE to the Other Charges section of the Invoice
The FEE will need to be already created and available to use in your Blackpurl. For further information on how to create a FEE, review our article - How to Create a New Fee
Once the FEE is available in Blackpurl, to add it to the Vendor Invoice, scroll to the
 section and click on
- This will take you to the Search to add section for you to search for and select the relevant FEE
- Once the user has added the relevant FEE to the Other Charges section, the user will need to change the information and Cost to suit
- Blackpurl does give the user the ability to do both a positive and negative amount
You may wish to include the Other Charges as part of the cost of the parts that you are receiving - Landed Cost Adjustment
The option - Include other charges as part of the inventory costs? - can be enabled at this time
For further information, please review our article - Landed Cost Adjustment (LCA)


Was this article helpful?
That’s Great!
Thank you for your feedback
Sorry! We couldn't be helpful
Thank you for your feedback
Feedback sent
We appreciate your effort and will try to fix the article